Thursday, November 10, 2011

Christmas Giveaway- Win a Pair of Baby Leg Warmers

The Giveaway is now closed. The winner is...
#3 
Torri P. 
Thanks everyone for entering!


I'm having another giveaway! Last year I sold TONS of these leg warmers in my esty shop, Socktopus Creations. They are seriously the cutest and softest leg warmers. Perfect for getting into the holiday season. And one lucky winner will get to choose between a pair of red with white polka dot leg warmers or the candy cane striped pair.
These can be worn with either the faux fur at the top or at the bottom.

Leg warmers are fabulous for that extra warmth on cool mornings, look great with a cute skirt, onesie, tutu, or for just around the house. They also add that fun extra touch to any outfit, especially for portraits!

They are great for babies when they start crawling, and make diaper changing so much easier. Leg warmers also help with making potty training easier too- Just throw a pair of leg warmers on your little one instead of tights or pants.

*******Leg warmers fit most infants through children to the age of eight. For infants, leg warmers will scrunch up on the legs and fit up by the diaper. They fit above the knee for toddlers and below the knee for most children up to the age of 8. Leg warmers measure 12-14 inches in length. I can also make infant size (8-10 inches in length, great for newborns-12 months).

They also make great arm warmers!

To Win:
Mandatory- Visit Socktopus Creations and leave a comment with your favorite item in the shop. Make sure to include your email address in your comment

Extra Entries (Make sure to leave a comment for each extra entry-
Add Socktopus Creations to your favoirtes on Etsy
Follow my blog
Post about the giveaway on Facebook
Blog about the giveaway
'Like' Socktopus Creations on Facebook- http://www.facebook.com/SocktopusCreations


Rules- This is open to the U.S. and Canada. Contest ends on November 25, 2011 11:59 p.m. (eastern time). Must provide a valid email address so that I can contact you. Winnner has 72 hours to reply to email or I'll draw another name. I'll use a radom number generator.

Sunday, June 26, 2011

Copy Cat: Felt Flower Pillow Cover

Trust me when I say there are a TON of felt flower tutorials out there. THIS ONE though is by far my favorite and even more so when used to make a mustard yellow flower! I made two of these and it's really easy, but slightly time consuming.


For the felt, JoAnns has a great variety. But since I'm a huge supporter of Etsy, I bought mine from HERE

Wednesday, May 4, 2011

Carried Away Creations Giveaway


A couple of months ago my sister in law opened up her own Etsy shop, Carried Away Creations. I have to say- she sells some of the cutest stuff! My favorite are the towel wraps. They are so fun, and she makes both kids and adult sizes!

To WIN a beautiful towel wrap head over to Shelayna's Blog for the giveaway. Hurry though, it ends on Saturday, May 7.

Also check out Carried Away Creations Blog

Thursday, March 24, 2011

Another Giveaway!

I'm featured in a huge giveaway over at Mirror Images Photgraphy

Head on over to win one of my toddler tutus and a satin hairclip and several other prizes! Entries are still low right now so you have an awesome chance to win a lot of fun stuff!

Wednesday, March 9, 2011

GIVEAWAY TIME!

And the winner is.....
Diana (#48)

! Giveaway is now Closed
My shop's one year anniversary is almost here! To celebrate, I'm having my first giveaway. Between now and March 18th you have a chance to enter to win 3 pair of leg warmers.

I absolutely love leg warmers for my kids! They are fabulous for that extra warmth on cool mornings, look great with a cute skirt, onesie, tutu, or for just around the house. They also add that fun extra touch to any outfit, especially for portraits!

They are great for babies when they start crawling, and make diaper changing so much easier. Leg warmers also help with making potty training easier too- Just throw a pair of leg warmers on your little one instead of tights or leggings.

Leg warmers fit most infants through children to the age of eight. For infants, leg warmers will scrunch up on the legs and fit up by the diaper. They fit above the knee for toddlers and below the knee for older children. Leg warmers measure 12-14 inches in length. I can also make infant size (8-10 inches in length, great for newborns-12 months).  Leg warmers also make awesome arm warmers for any age!

Now on to the giveaway details!...

Winner will be announced on March 19th.

Here's how to enter-

1.Visit my shop at Socktopus Creations
pick out which 3 leg warmers you would want if you won. Then come back here and leave a comment with your answer.

2. Extra entries-
 (Leave a comment for each extra entry that you do. You must complete #1 before doing any of the extra entries below)
*Follow me on my blog
*Post about the giveaway on your blog
*Post about the giveaway on facebook-
*Like my page on facebook- http://www.facebook.com/SocktopusCreations (if you have already, just tell me so in a comment)
*Leave a comment with your absolute favorite tutu/colors you like or would choose from my shop


other quick and simple rules-
*must leave an email address so that I can contact you if you win
*only open to those living in the United States and Canada
*giveaway ends at 11:59 pm (eastern time) on March 18th, 2011
*On March 19th I'll randomly draw a winner!
*I will notify the winner by email. If I don't hear anything back within 72 hours then I will randomly draw another winner.

Monday, September 6, 2010

Little Man Ties Tutorial

Items you will need
Straight pins
Man's Tie
Scissors
3/8 elastic
matching thread
sewing machine
needle
3/8 triglides and side release buckles (optional)

First measure your little man from the collar bone to where the belt buckle would rest. Double that measurement plus one inch and you have the length of your tie. 

Guide: Newborn- 7 inches (15 inches altogether)
Infants- 8 inches (17 inches altogether)
6-18 months- 9 inches (19 inches altogether)
 24 months- 10 inches (21 inches altogether)
2T-4T- 11 inches (23 inches altogether)


Use another boys tie, or Pattern (I've included newborn, infant, and toddler sizes) to lay down on the tie you plan to alter into a boys tie. Find where the pattern perfectly fits width wise on the tie you bought. Measure out the length you need from that point to the skinny end of the tie.

*if making an infant tie, you can use the skinny end of the man's tie as one end... in other words you will only have to alter one end*

I mark what will be my tie ends with a straight pin. Then cut on a diagonal a couple of inches up from the straight pin. Do this with both the large and short end.

Your tie will look like this...

Pull back the fabric so that you can trace your tie pattern onto the inside fabric.

Now fold down the point so that right sides are together and you have the raw edges lined up against each other

Carefully (so not to snag the material)  pin in place

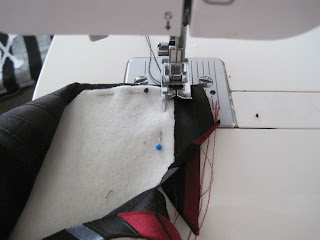
Sew a straight stitch on the raw edge side- using the tie point you made as a guide for your sewing

turn right side out, and push the point out with your finger or pencil

Now the fun part :)
Work with the tie to shape it into looking like an actually tie. This takes a little practice and time, since the material was originally pressed to lay straight, not fold in and such. But it will adventually fold how you want.
I usually trim some of the extra material off,  tuck in the rest and then fold one side, pin. Then fold the other side and pin and press. Always check the front of the tie to make sure it looks right!

I prefer to use straight pins as little as possible to keep from snaging the material, so I make sure to press extremely well. Then using a Blind stitch, hand sew back together.

Remember the measurement you took for length of the tie? Whatever you decided you wanted the tie length to be when worn add 1 1/2 inches to that in the front. For example: If I am making an 11 inch tie, I have a tie that is 23 inches in length, I then fold it to where the front of the tie measures 12 1/2 inches.
Go down one inch from the fold of the tie, and on the left side (front of tie facing you) so the two sides together

Elastic time! Using triglads and buckles is totally optional. I've seen ties with just the elastic used, so you slip it over the childs head. I've also seen ties with snaps attached to the elastic. I chose this way...
Mind you from here on out, the pictures will do most of the explaining..
Measure the childs neck and add about 5 or so extra inches (this part isn't down to a science)

Fold one end of elastic through one side of the buckle and hand sew.

Loop through the triglide

Loop through the other end of the buckle

And back through the bottom of the triglide to make the adjustable loop part (a little tricky). Fold elastic back over bottom part of triglide and hand sew the end onto the elastic.

Now for the last part! Wahoo!

Put the elastic below the stitch, inbetween the to ends of the tie

(Stick with me here...)
With tie facing you, pull the back end of the tie (skinny half) towards you and up. Now pull it through the hole above the stitch (pulling to the left, shown in picture below)
Keep pulling it down, while pulling the elastic up so it starts to look take on the 'triangle' shape of a tie

Now you should have the front (large) half of the tie hanging out on the right. Take this piece and pull it under and up through the elastic loop.

Now tuck it down into the front of the triangle and pull through.  

Sunday, August 29, 2010

Cupcakes

I dream of one day having my own little cupcake shop, or at least some kind of cupcake catering thing going on! I seriously spend so much time just thinking of all the different possible cupcakes, fillings, and frostings I could do.

Recently I took a Strawberry Cake recipe that I love and made it into an Orange Cake recipe with just a couple of changes. Combine that with a White Chocolate Buttercream Frosting recipe that created and you have a sweet summery cupcake!

Here's the Strawberry Cake Recipe with the Orange substitutions in parentheses:

2 cups white sugar

1 (3 ounce) package strawberry flavored gelatin ****(Orange flavored gelatin)****
1 cup butter, softened
4 eggs (room temperature, separated)
2 3/4 cups sifted cake flour
2 1/2 teaspoons baking powder
1 cup whole milk, room temperature
1 tablespoon vanilla extract
1/2 cup strawberry pureed *****(1/2 cup of Orange Juice)****

Directions
1.Preheat the oven to 350 degrees F (175 degrees C). Grease and flour two 9 inch round cake pans.
2.In a large bowl, cream together the butter for 3 minutes, add sugar and dry strawberry gelatin (or orange gelatin) and cream until light and fluffy. Beat in egg yolks one at a time, mixing well after each. Combine the flour (sift and then measure) and baking powder; stir into the batter alternately with the milk. Blend in vanilla and strawberry (or orange juice) puree. In chilled bowl, with clean beaters, beat egg whites until fluffy. Fold into batter with wooden spoon. Divide the batter evenly between the prepared pans.
3.Bake for 25 to 30 minutes in the preheated oven, or until a small knife inserted into the center of the cake comes out clean. Allow cakes to cool in their pans over a wire rack for at least 10 minutes, before tapping out to cool completely.

Once cooled, I prefer to wrap in saran wrap and then put in a Ziploc on the counter until I am ready to frost it. It helps keep it from becoming dense.


White Chocolate Buttercream Frosting: (makes a ton, so if you go easy on the frosting then half the recipe!)

6 cups of sifted powdered sugar
1/2 tsp. salt
3 sticks unsalted butter, at room temperature
11-12 ounces of white chocolate, melted
1 tsp pure vanilla extract
1/2 cup heavy whipping cream

Cream butter for 3 minutes, mix in vanilla and chocolate. Add sifted powdered sugar and salt, 1/2 cup at a time. Mix in heavy whipping cream just until mixed.  

Sunday, August 15, 2010

Toddler Apron

I found THIS cute tutorial over at Silly Piggy Monkey and loved it! She even has a pattern for 2T-4T size that you can print out.


I just made a couple of differences- I added rick rack to the pockets and the edge and sewed the pockets closer to the middle. I think little Miss H will love it!

Sunday, July 18, 2010

A New Look for Our Table

While our little white table has been charming and all, it was in great need of a makeover. Lets face it anything white doesn't last very long with a toddler running about!


First we started by recovering the chairs... Super Easy! I just took out the staples from the chairs, making sure to take a picture of how the fabric was folded at the corners so I could reference back to it.


Use the old chair fabric for a pattern on your new fabric. Make sure to iron really good before stapling the new fabric onto the seats.

(This is where the pictures lack in number... sorry!)
When recovering the seats, choose a side of the seat to start on, pull very tight and staple on the ends of that side working your way into the middle. Then do the same thing to the opposite side of the seat that you just stapled. Do that to all sides and then fold up the corners and staple (refer to the picture you took if needed).

We refinished the chairs the easy way- Spray Paint! We lightly sanded the chairs until they were dull, wiped down with mineral spirits, and then sprayed away!

My husband takes full credit for the table, such a great guy! He sanded it down to remove the top layer (it's fake wood, so we only needed to lightly sand until dull). Then he painted a few layers of glossy espresso paint on it. After letting it dry for a week he lightly sanded and applied a layer of urethane to seal and protect it.


And the final result:

Sunday, June 27, 2010

Silhouettes and Link to the Tutorial

One more addition to the nursery decor (almost done with the room, just need to paint a mural and finish up some pillows)!

 I found an easy way of doing silhouettes over at Prudent Baby. The project didn't cost anything! I used some white frames I had on hand which I painted yellow (free paint from Glidden, Score!), then used some black and white cardstock paper I had in my scrapbooking stash.

Oh, but the print in the middle did cost... so if you count that then yes I spent money. But I had to buy the print, just had to! It's from the Primary Bird. Cute stuff!

pay no attention to the crazy angles, I was trying to avoid having the light glare on the glass